
Installing an SPFx solution across many SharePoint sites is rarely hard because the package itself is complex. It becomes hard because the rollout process is repetitive, easy to mis-scope, and often too dependent on PowerShell for day-to-day admin work.
AppFlow Control gives administrators a UI-driven way to select the right scope, choose the target sites, and monitor the rollout without turning every deployment into a scripting exercise.
Why Bulk SPFx Rollouts Become Painful At Tenant Scale
The pain usually starts when one deployment has to become a repeatable operational workflow.
Administrators need to:
- decide whether the deployment belongs in the tenant app catalog or a site collection app catalog,
- select the right target sites,
- keep the rollout consistent across environments,
- and explain what was changed after the deployment finishes.
As those requirements grow, one-off scripts and manual selection work become harder to maintain.
Why Native SharePoint Deployment Options Still Leave Admins With Manual Work
Native SharePoint app catalogs support package distribution, but they do not provide a strong operational layer for bulk rollout decisions. Teams often still need extra steps to filter sites, repeat the same install action safely, and confirm progress afterward.
That gap is one reason SharePoint app management breaks at scale. The platform has the deployment mechanism, but administrators still need a practical control surface around it.
Tenant App Catalog Or Site Collection App Catalog?
Before starting the rollout, decide which app catalog matches the scope of the change:
- the tenant app catalog is the better fit when the solution needs broader centralized distribution,
- the site collection app catalog is the better fit when the rollout should stay local to a specific boundary.
If you are still comparing those two options, read SharePoint app catalog vs site collection app catalog before you finalize the deployment model.
Step-By-Step Guide
Step 1: Sign In or Sign Up
Visit AppFlow Control and sign in or sign up if you do not already have an account.

Step 2: Connect to Your SharePoint Online Environment
Ensure your SharePoint Online environment is connected to AppFlow Control if you have not done so already.
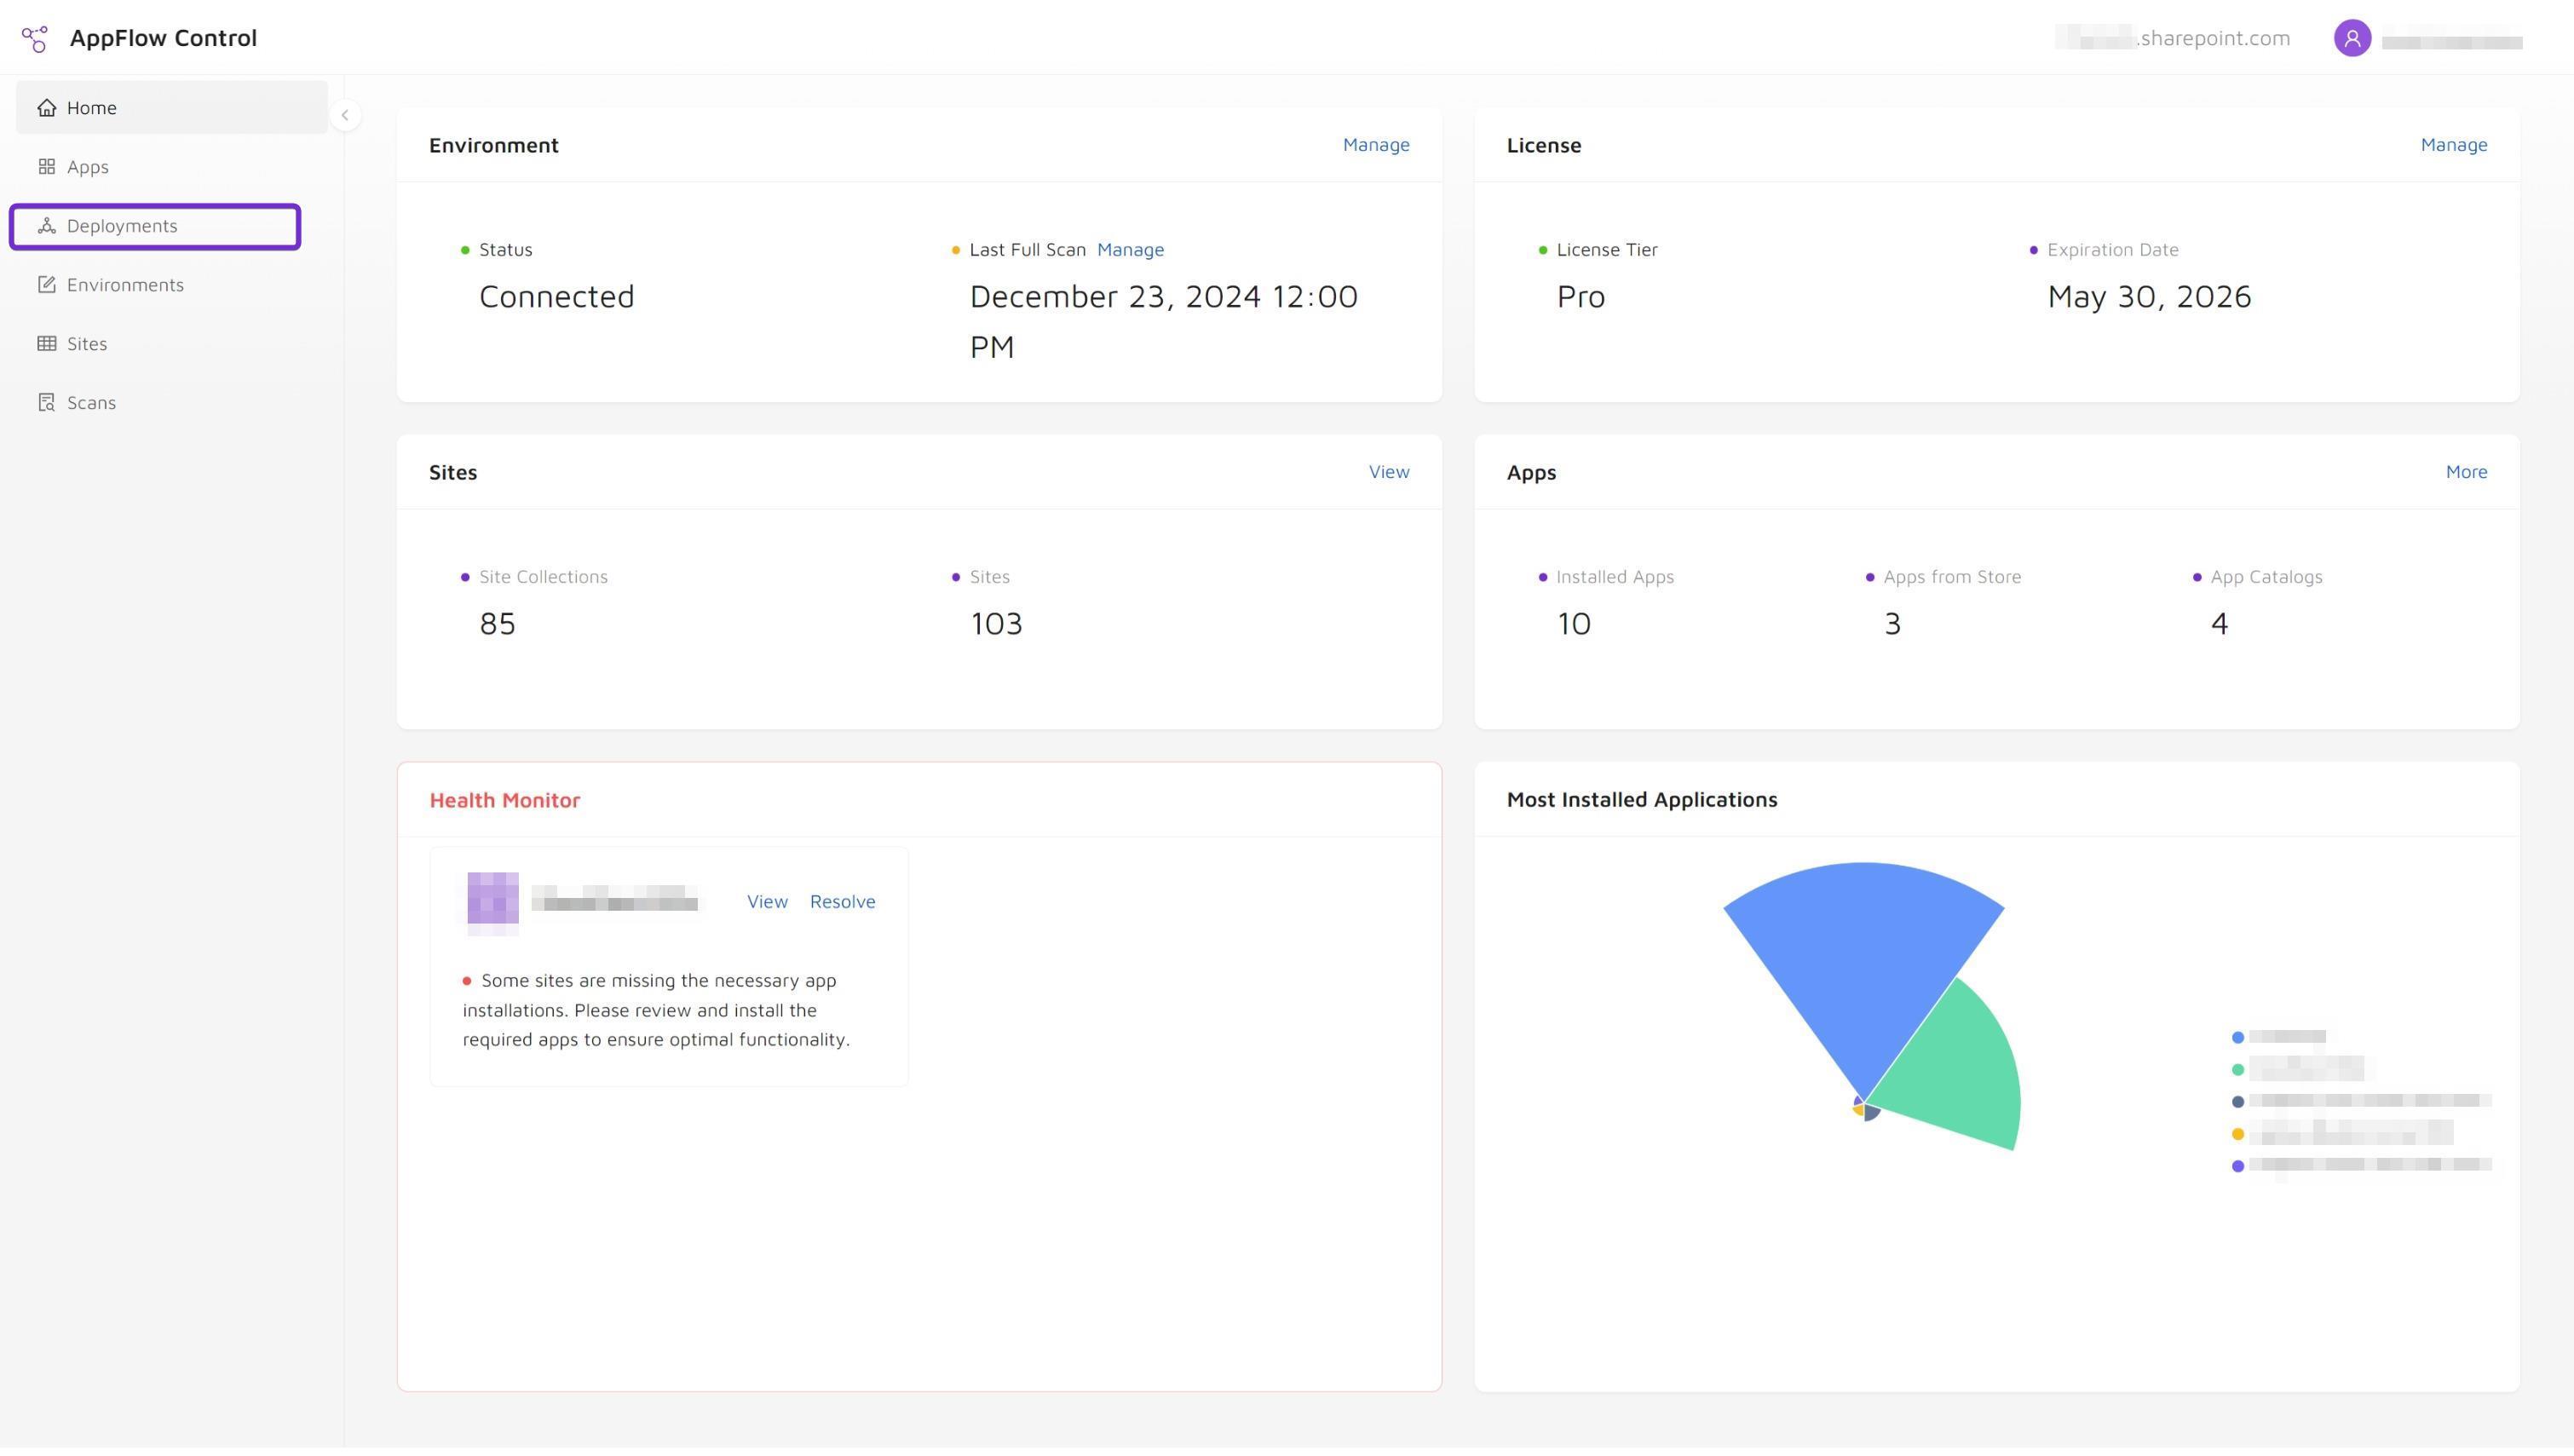
Step 3: Navigate to Deployments
Select Deployments from the AppFlow Control menu.
Step 4: Add a New Deployment
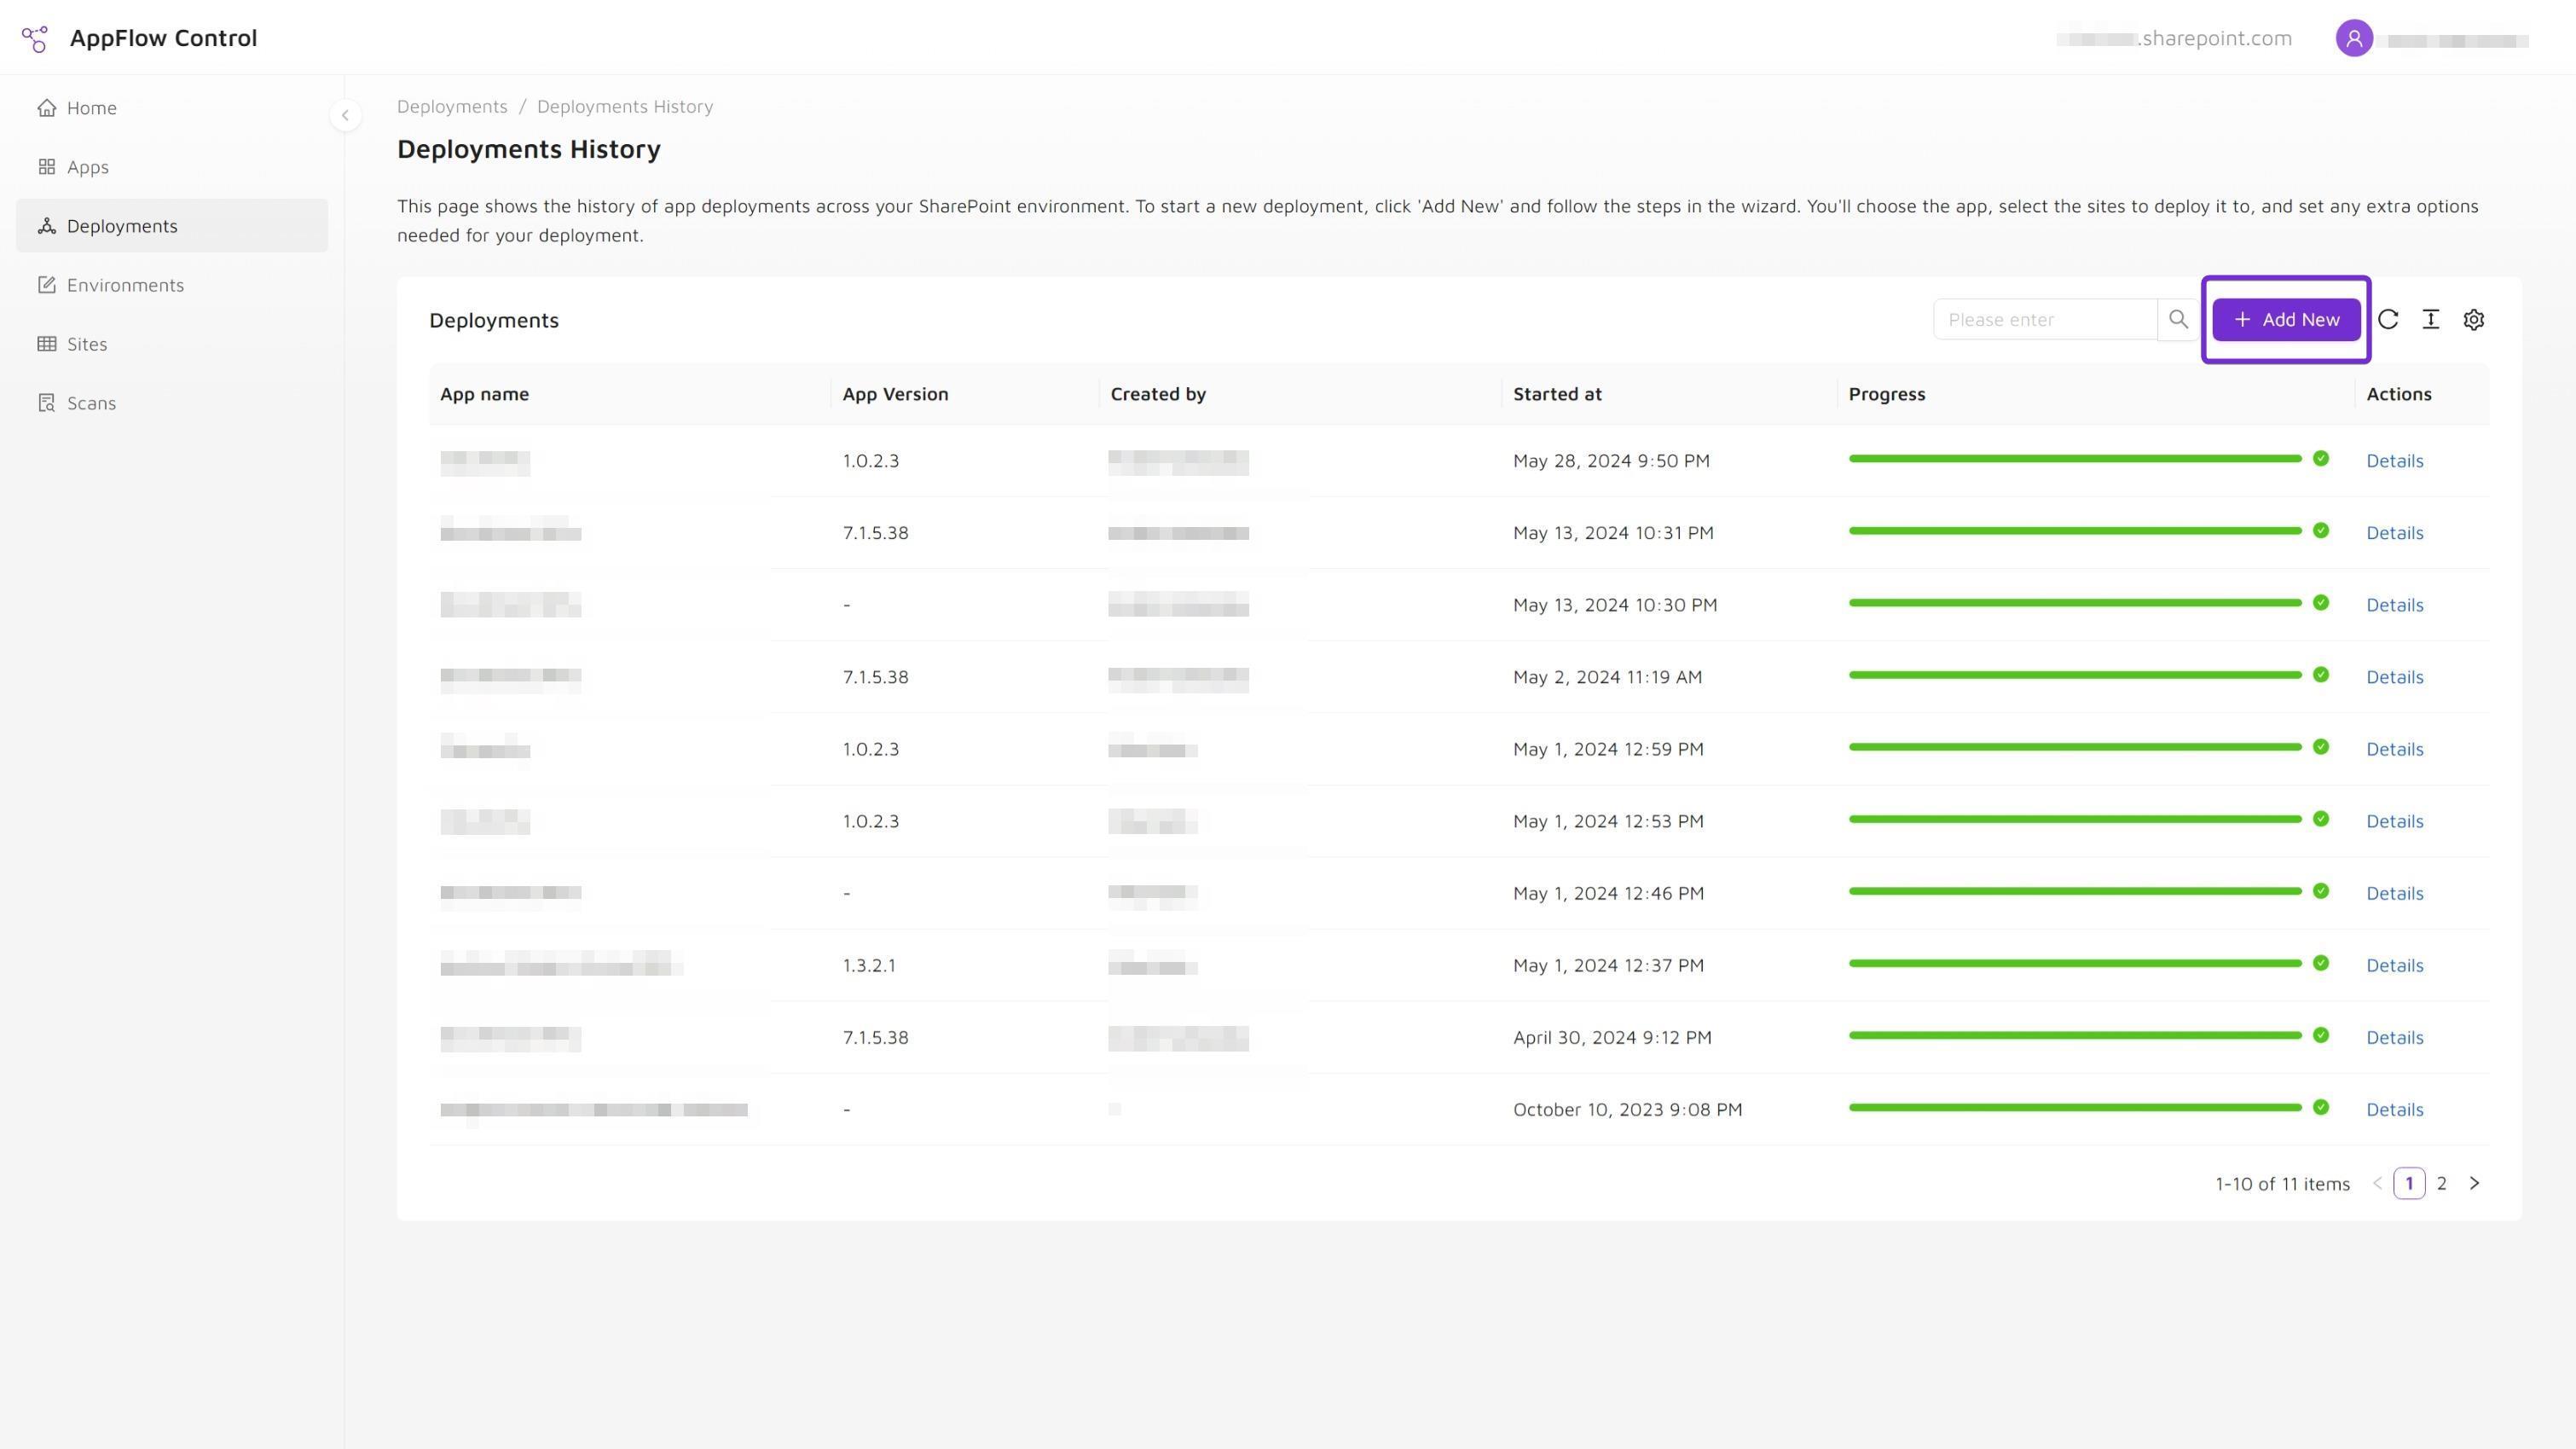
On the Deployments page, click Add New.
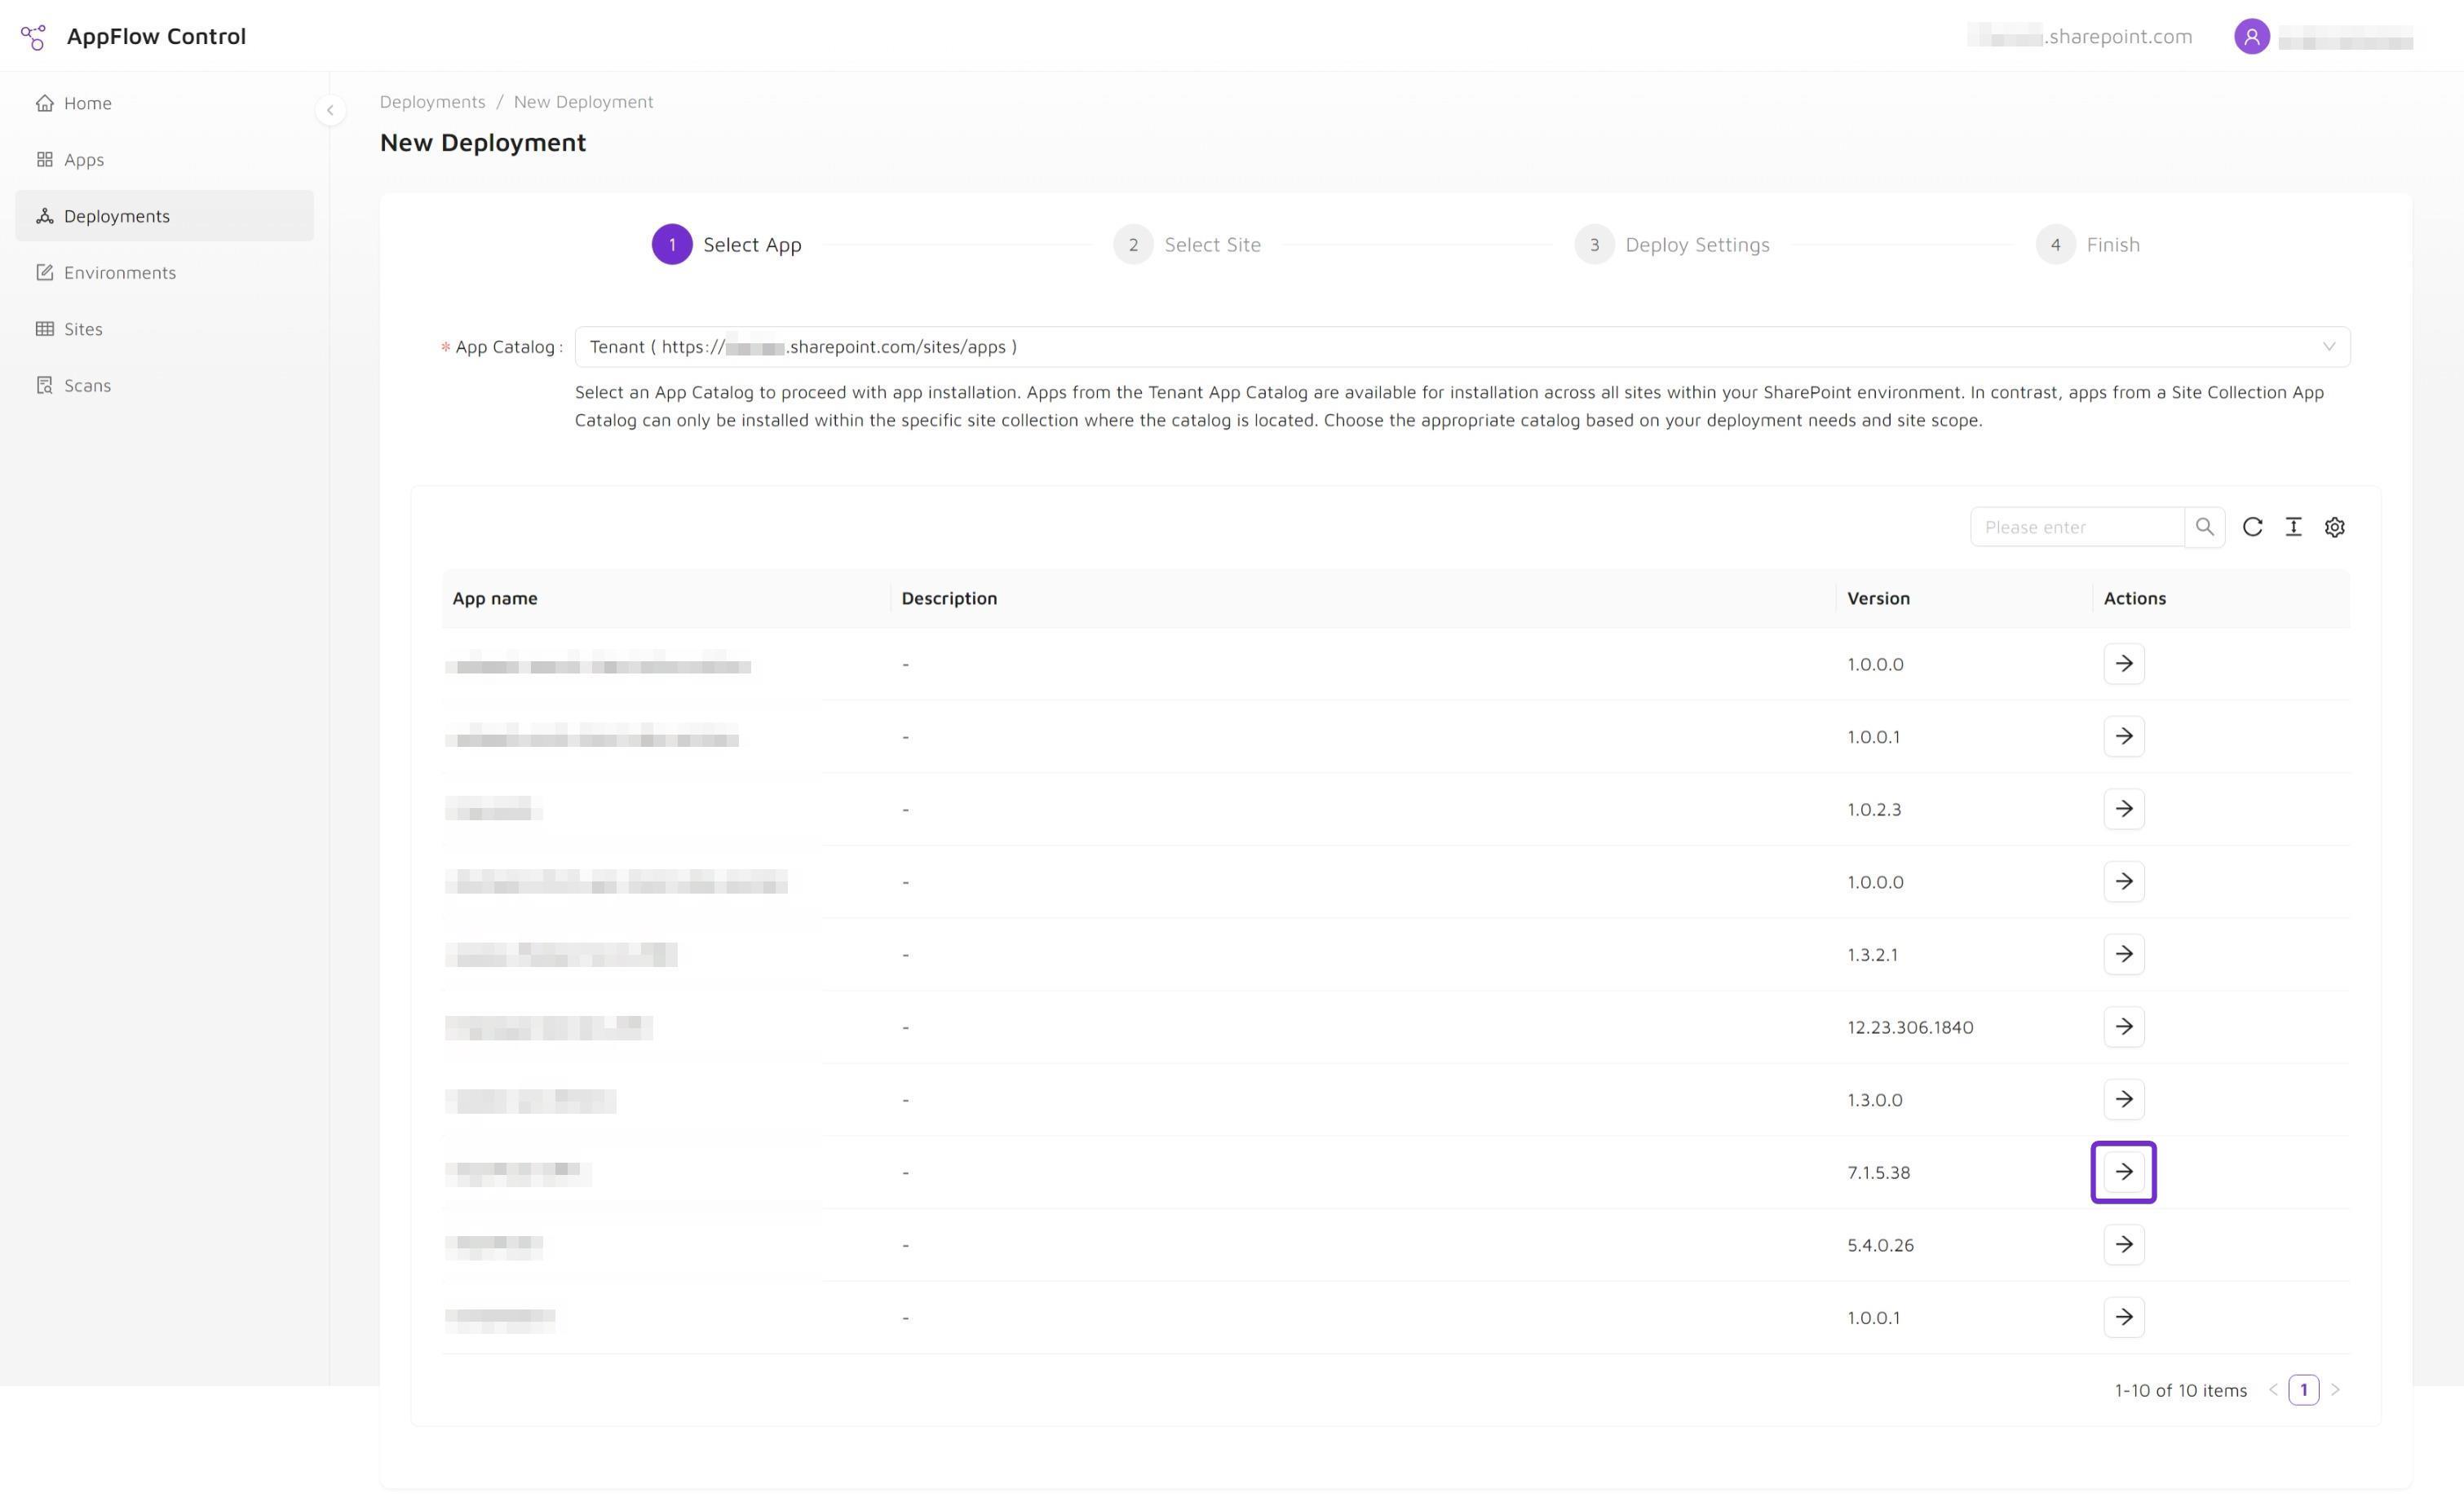
Step 5: Select an App Catalog
Choose the App Catalog that matches your deployment scope:
- Tenant App Catalog for installations across all sites in the SharePoint environment.
- Site Collection App Catalog for deployments limited to a specific site collection.
Select the option that matches where the app should be installed.
Step 6: Choose the App
From the list of available apps, click Select for the SPFx app you want to deploy.
Step 7: Select the Target Sites
Choose the site collections where the app should be installed, then click Install for the selected sites.
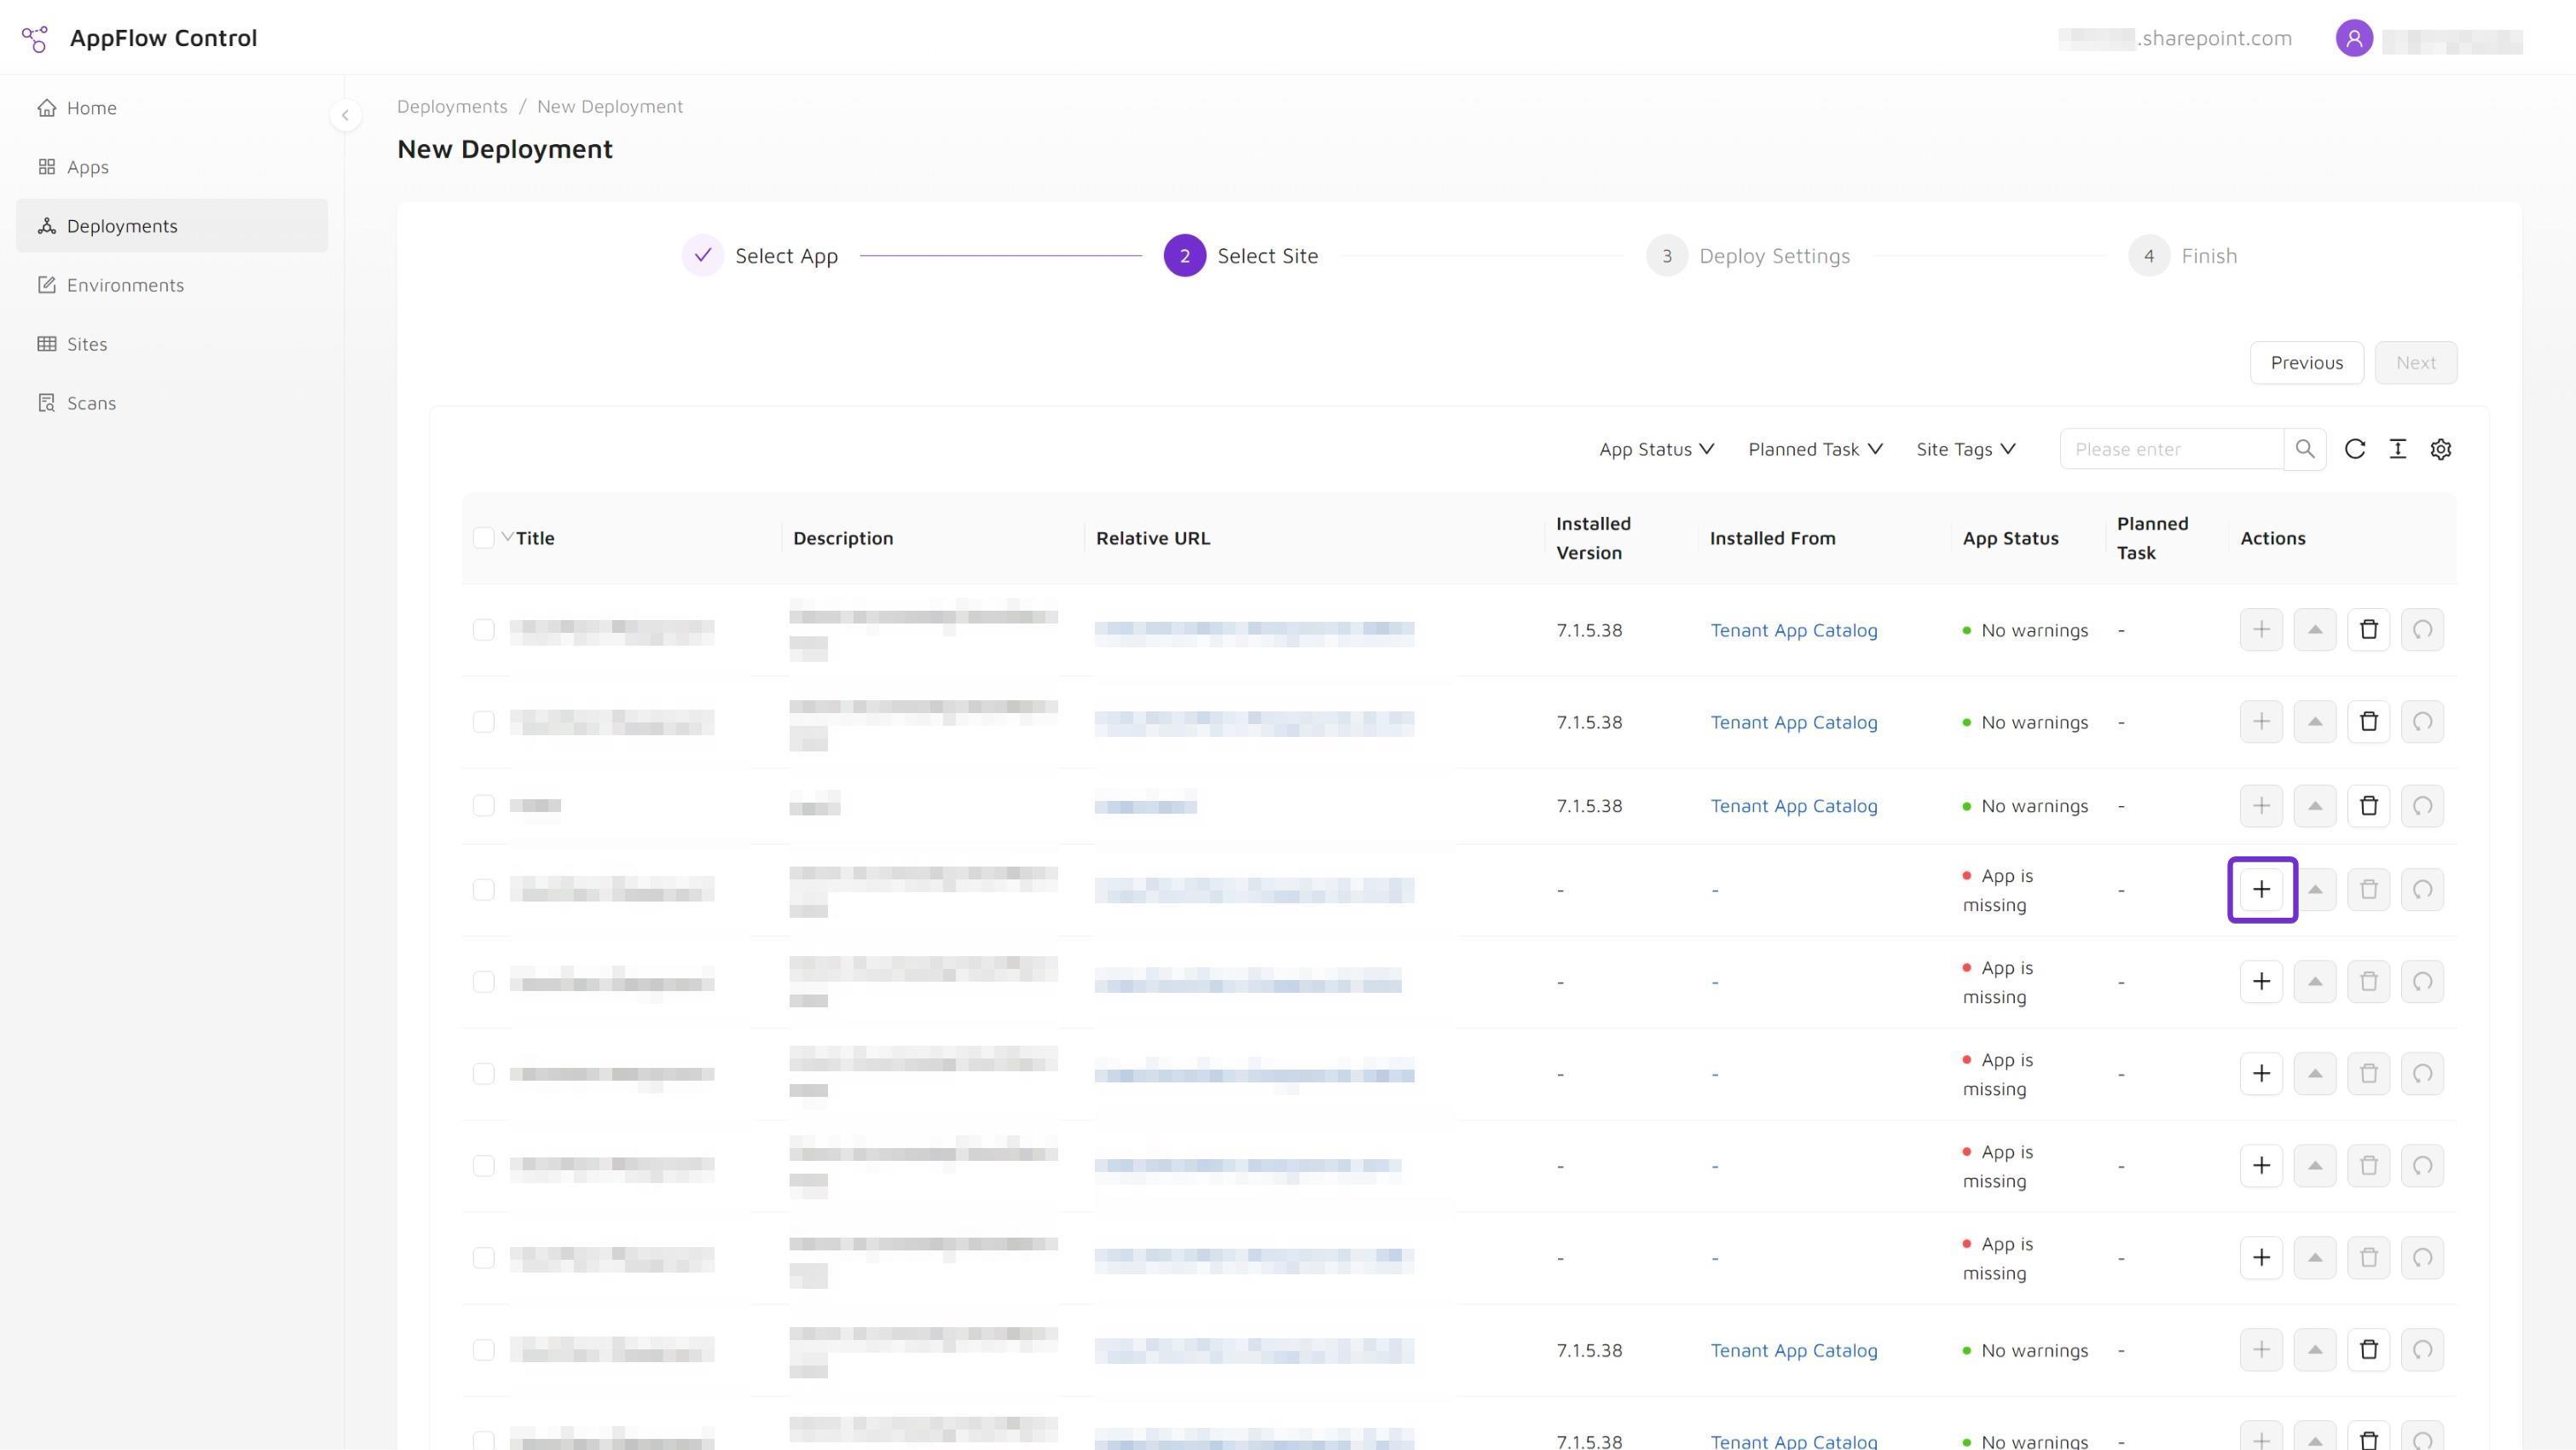
Step 8: Search and Filter Sites
Use the built-in search and filtering tools to locate the right site collections quickly before applying the deployment.
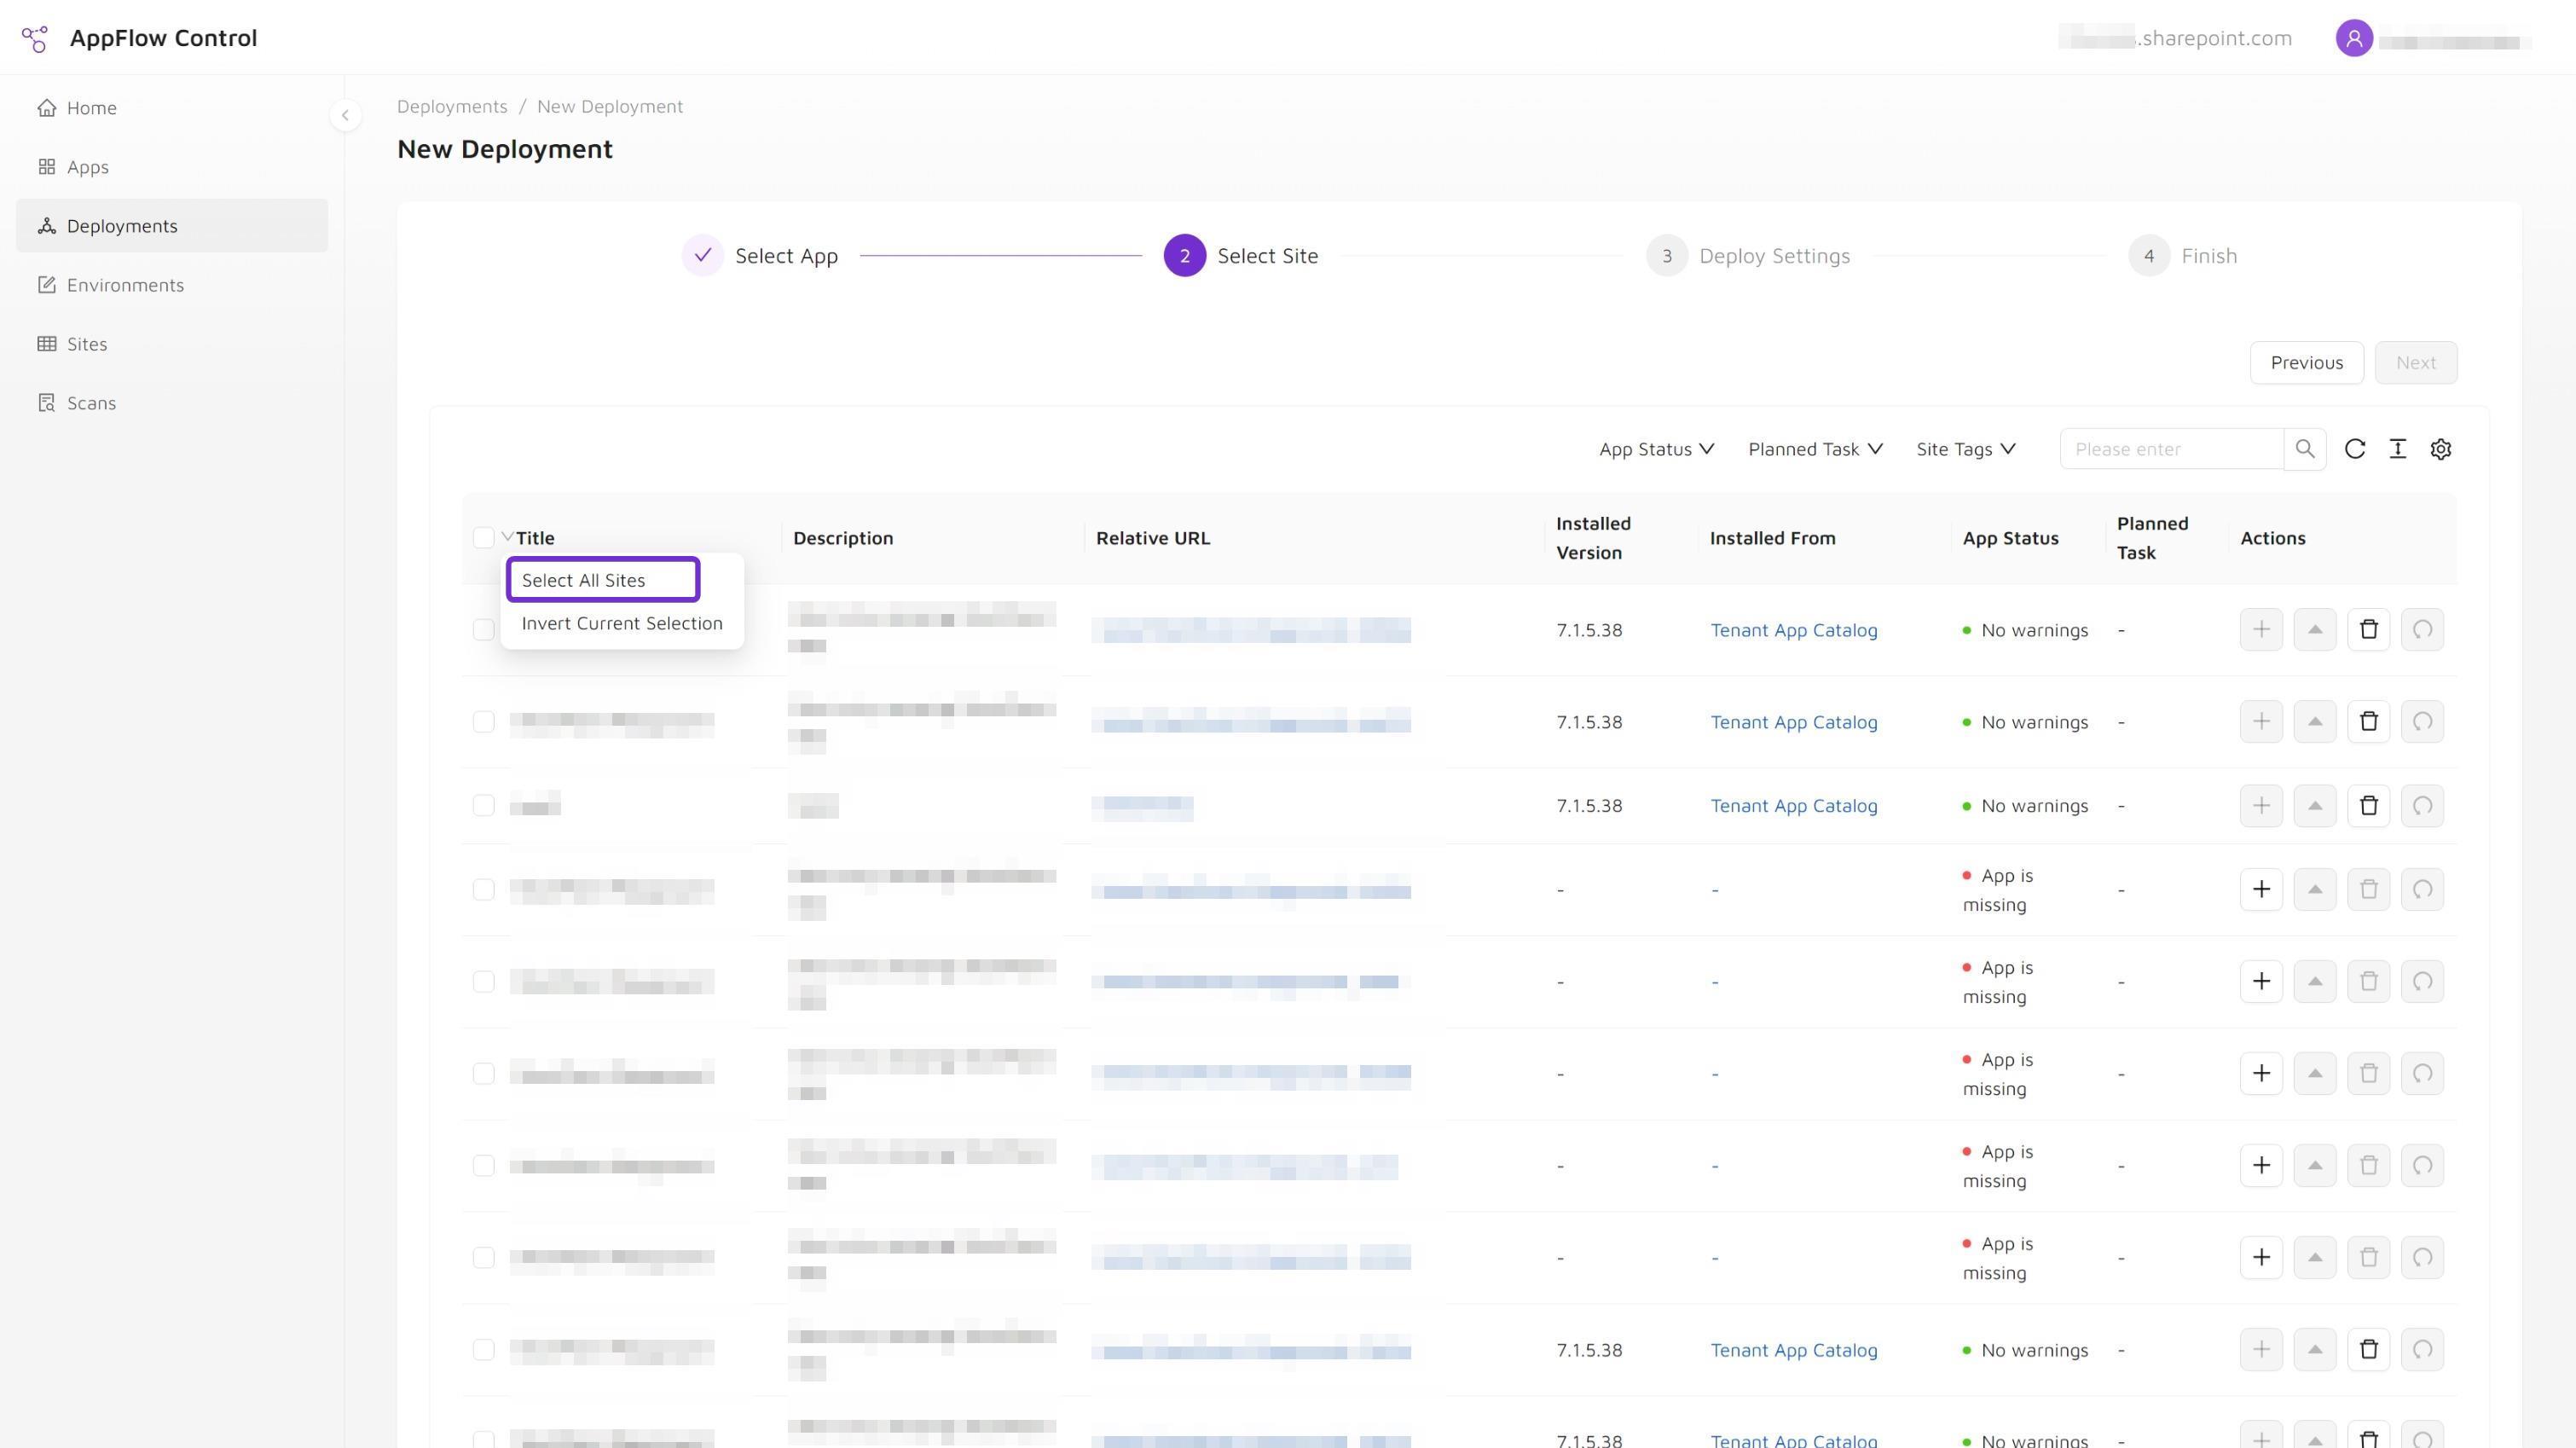
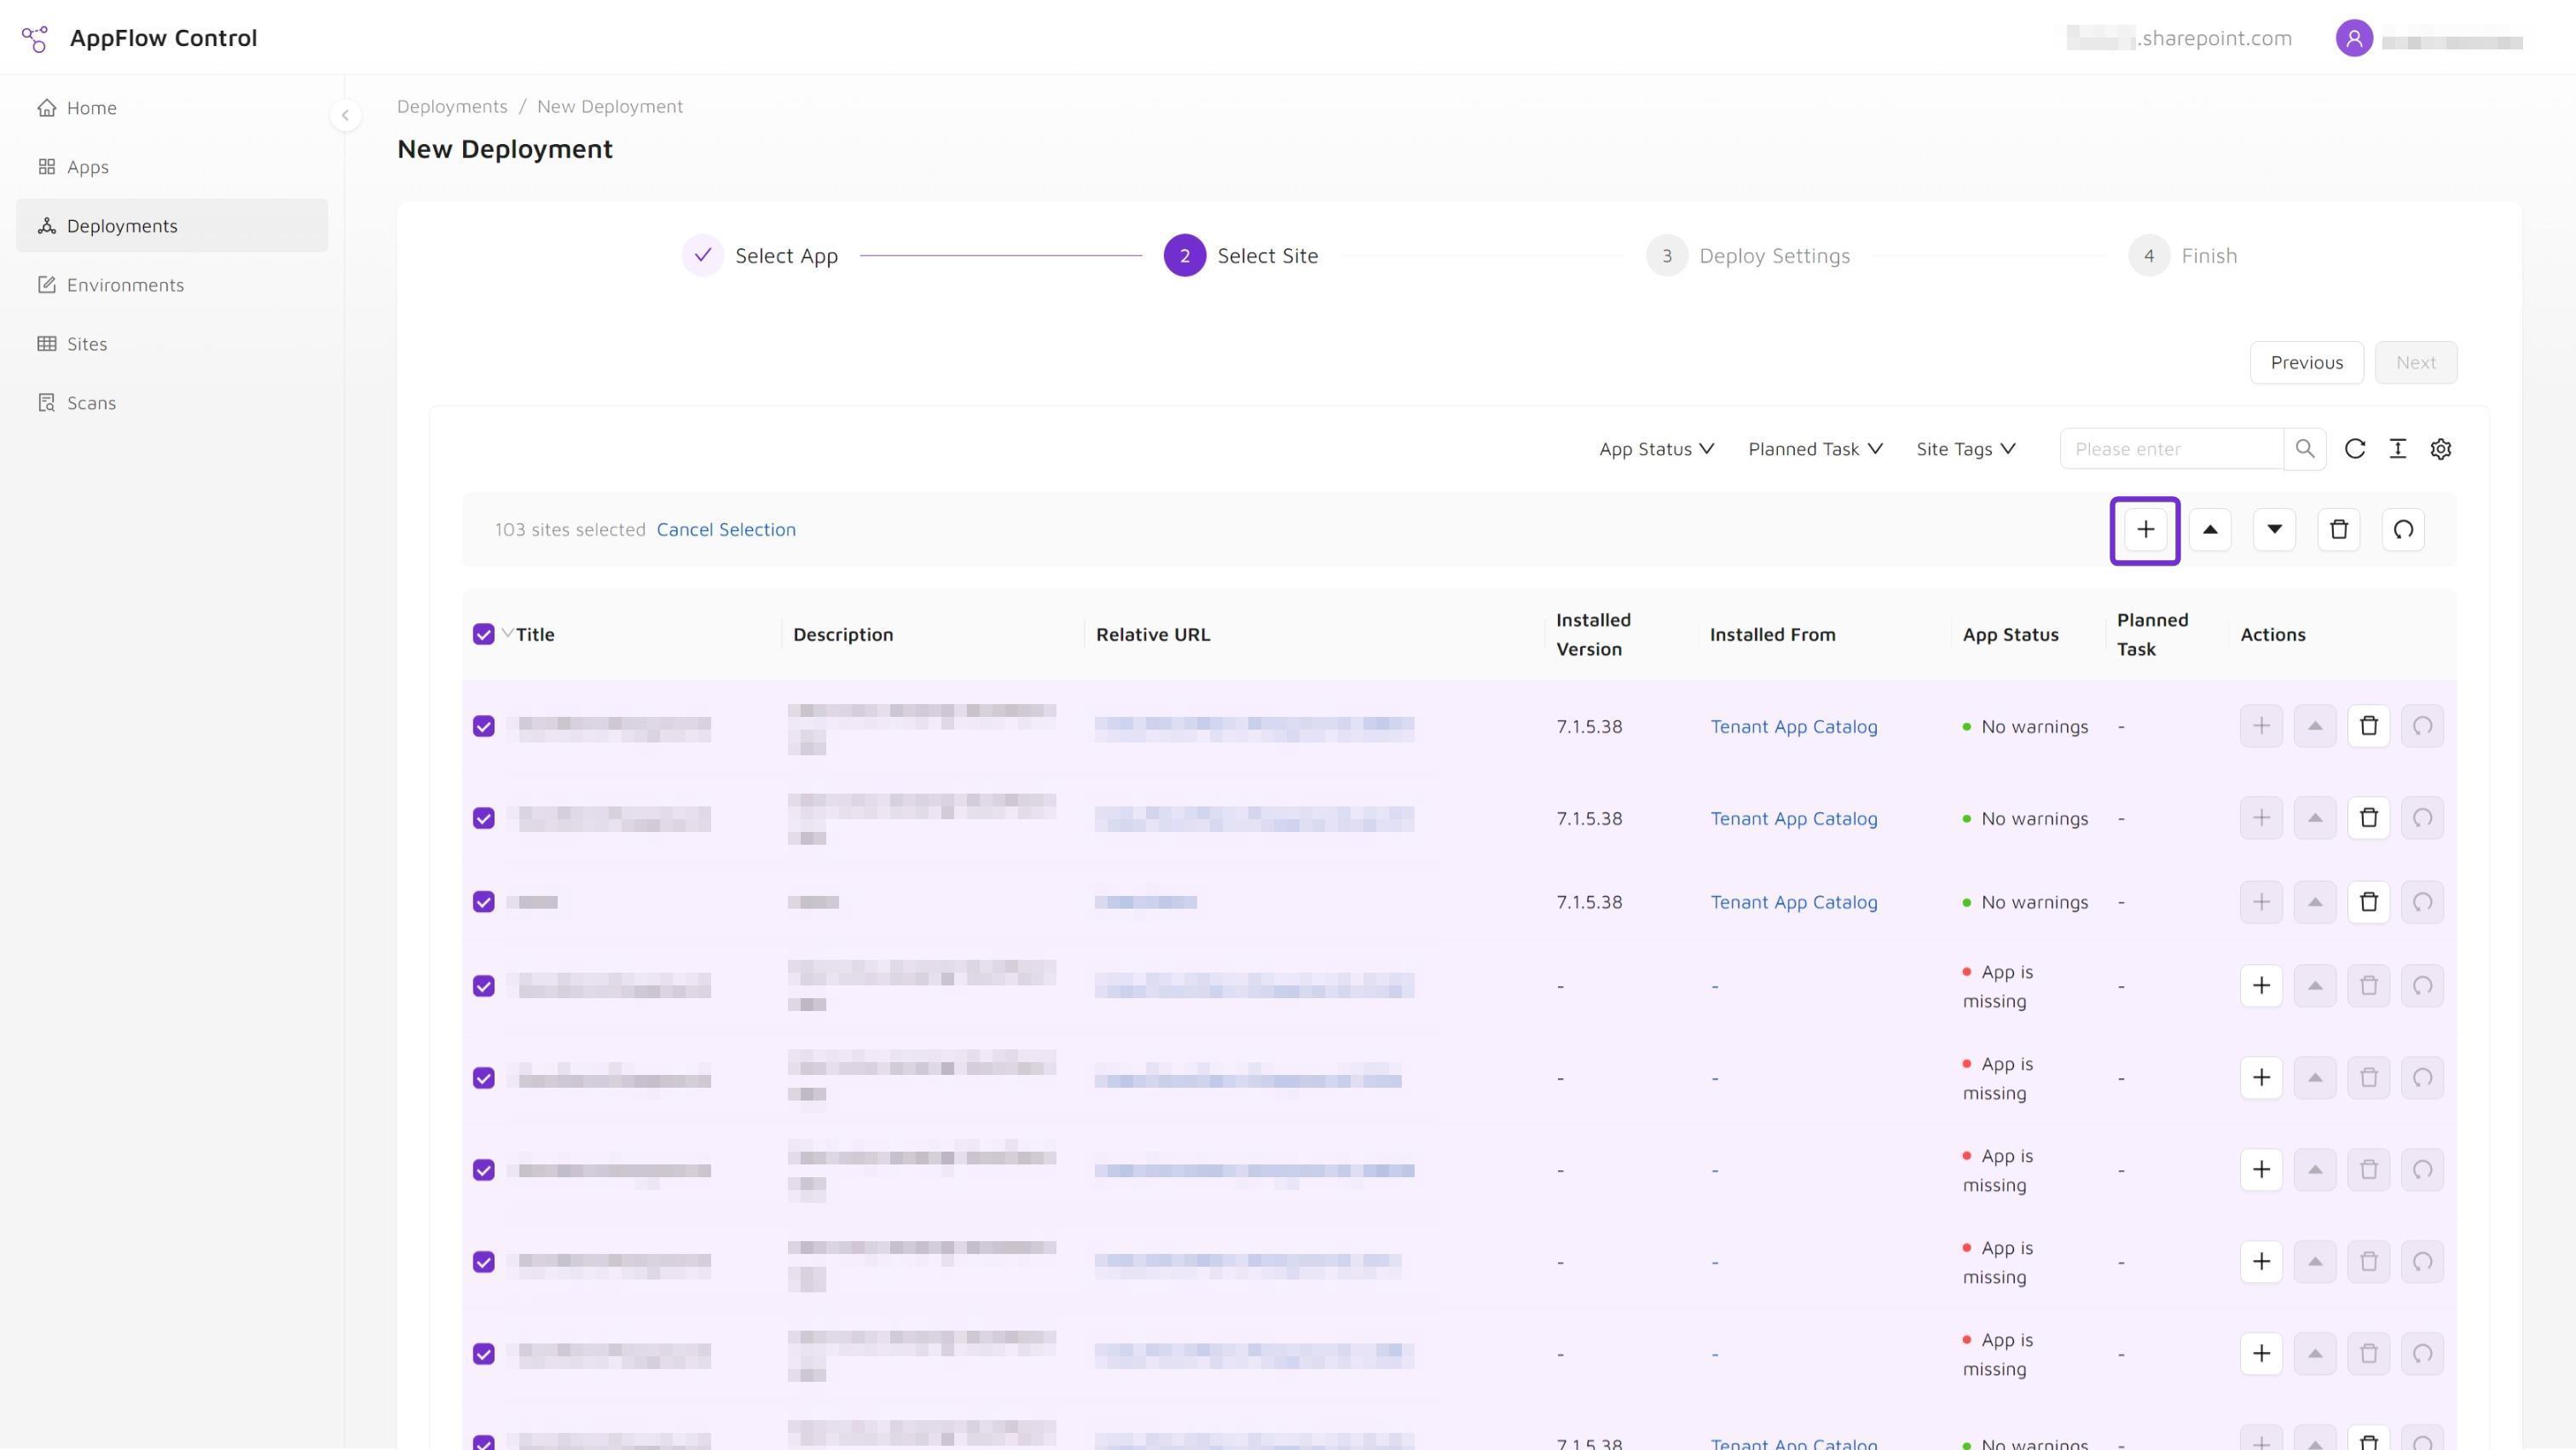
Step 9: Bulk Installation
To install the app on all sites or all filtered sites:
- Hover over the down arrow in the title column.
- Choose Select All Sites.
- Click Install from the actions above the table.
Step 10: Deploy Settings
After the site selection step:
- Click Next.
- If the app requires scripting capabilities, enable Scripting Capabilities in the deployment settings.
- Click Next again to continue.
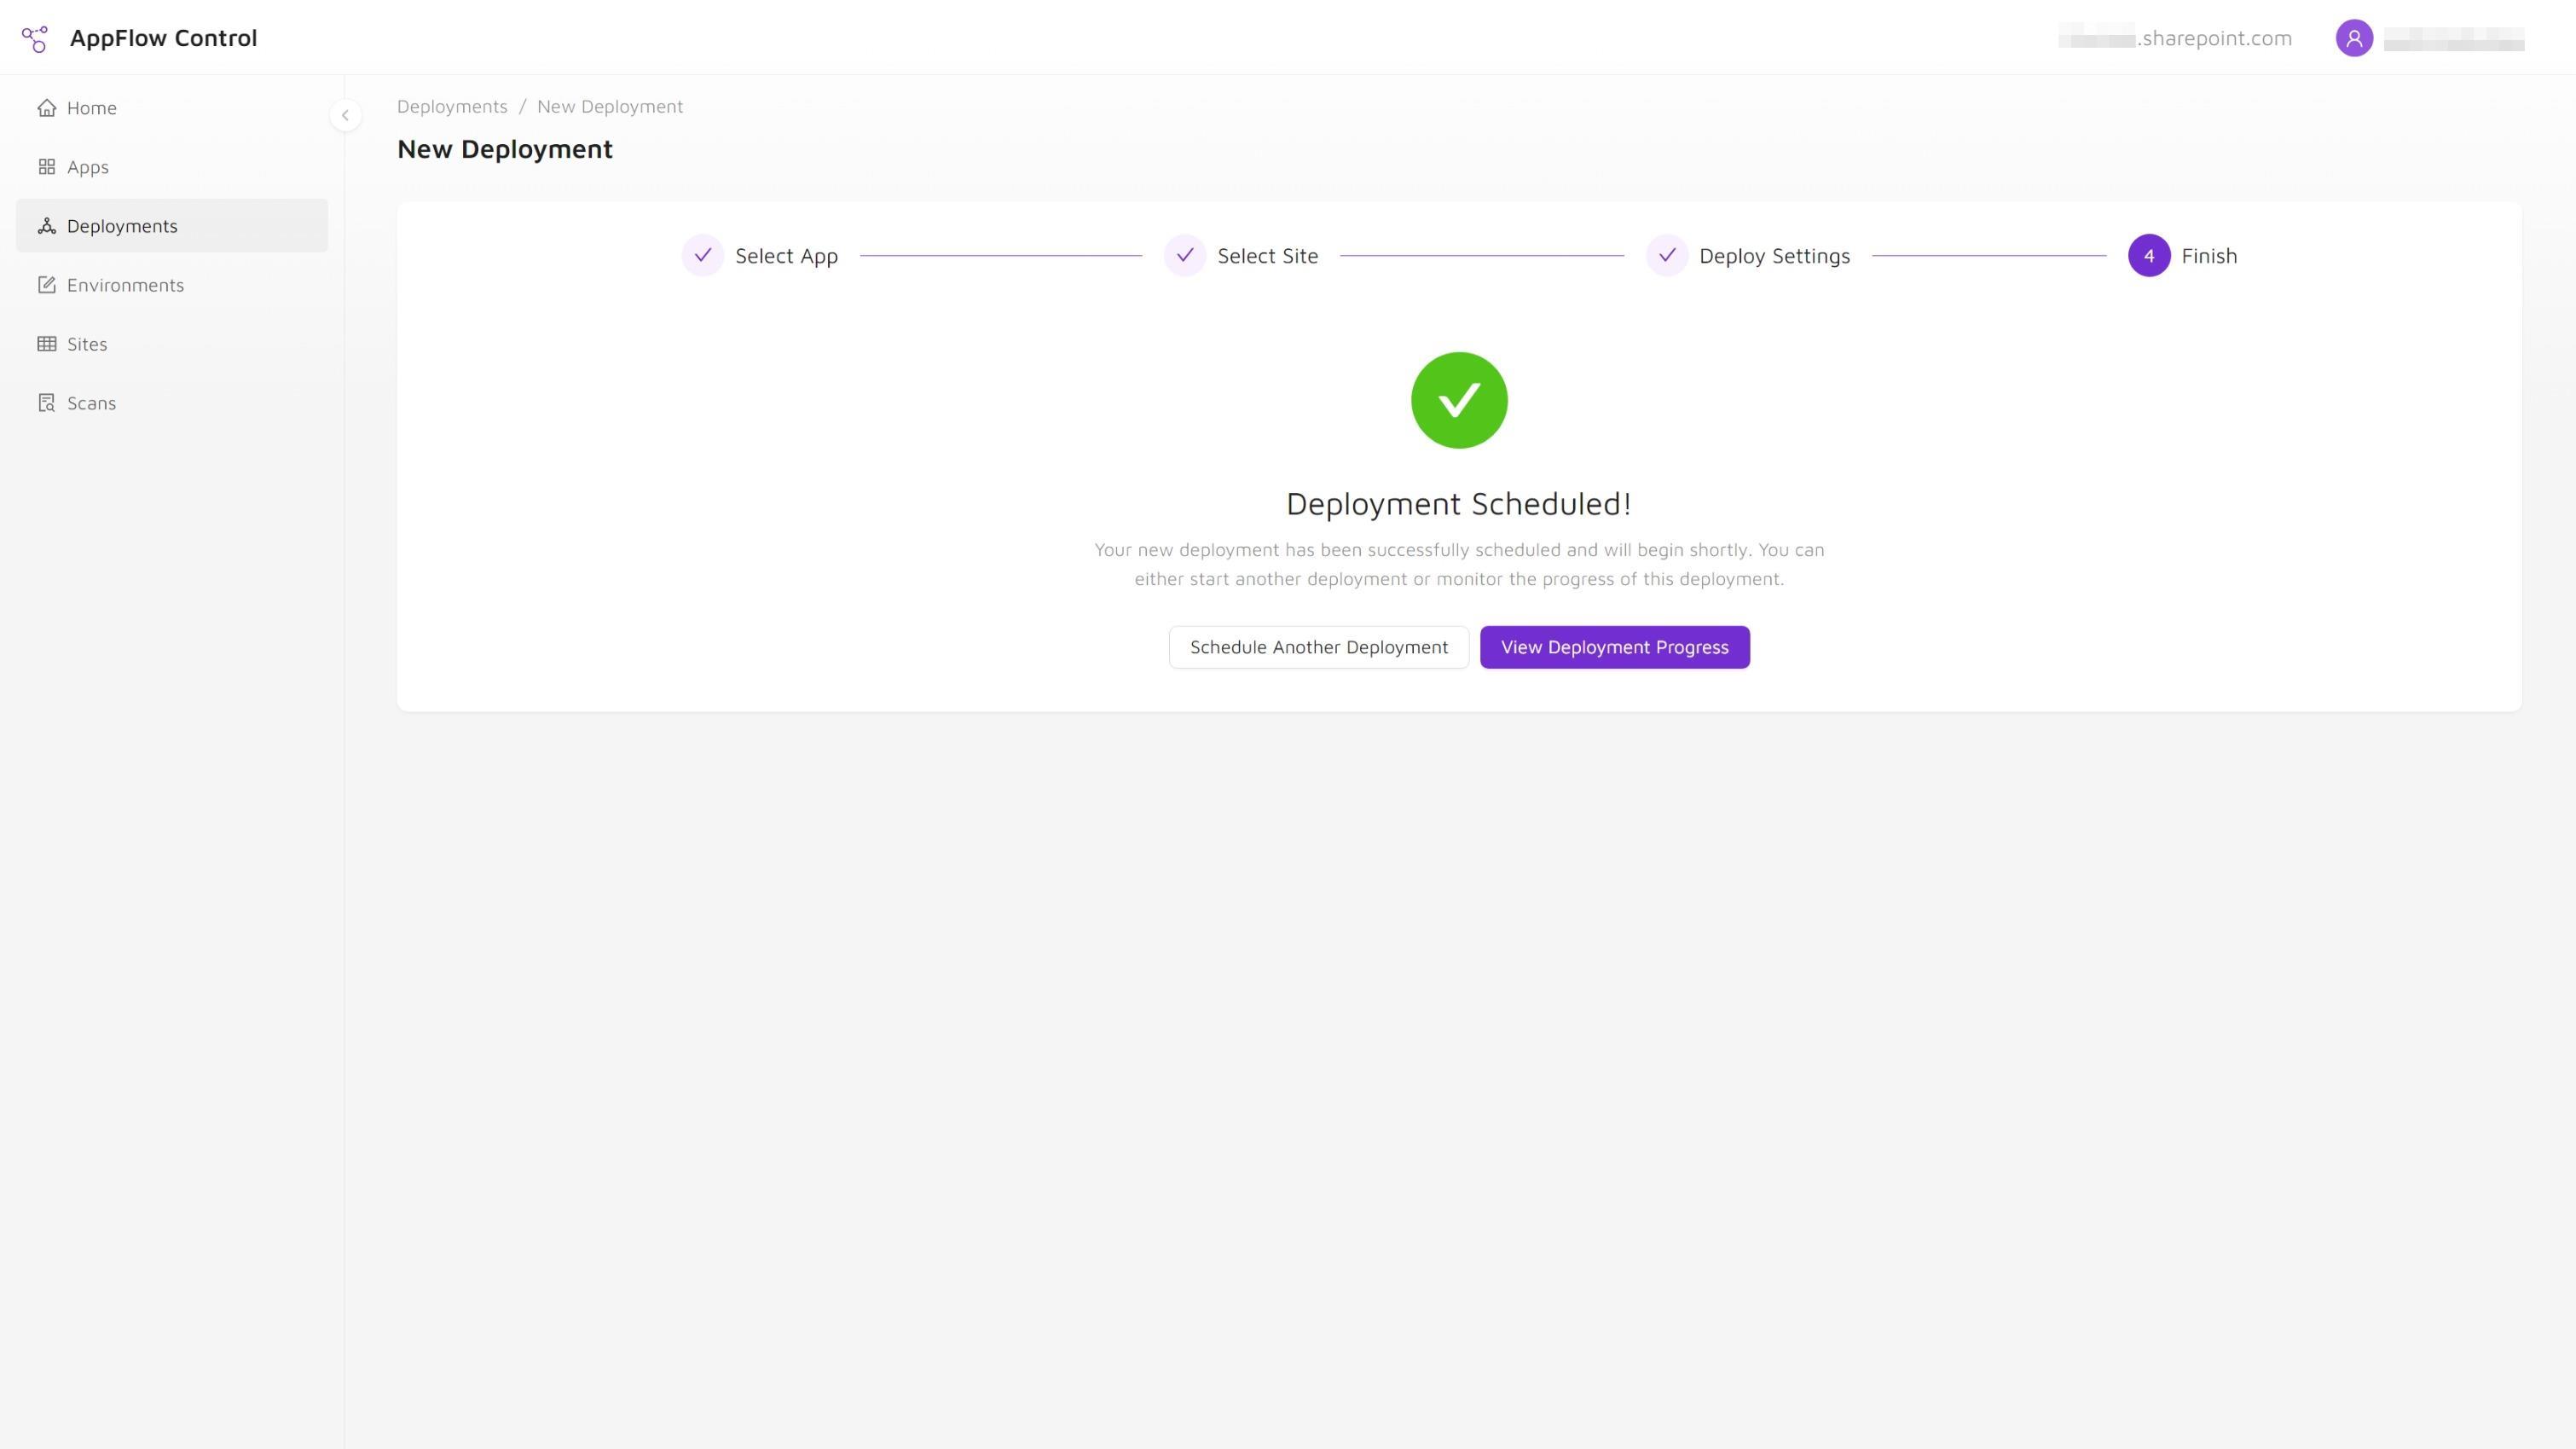
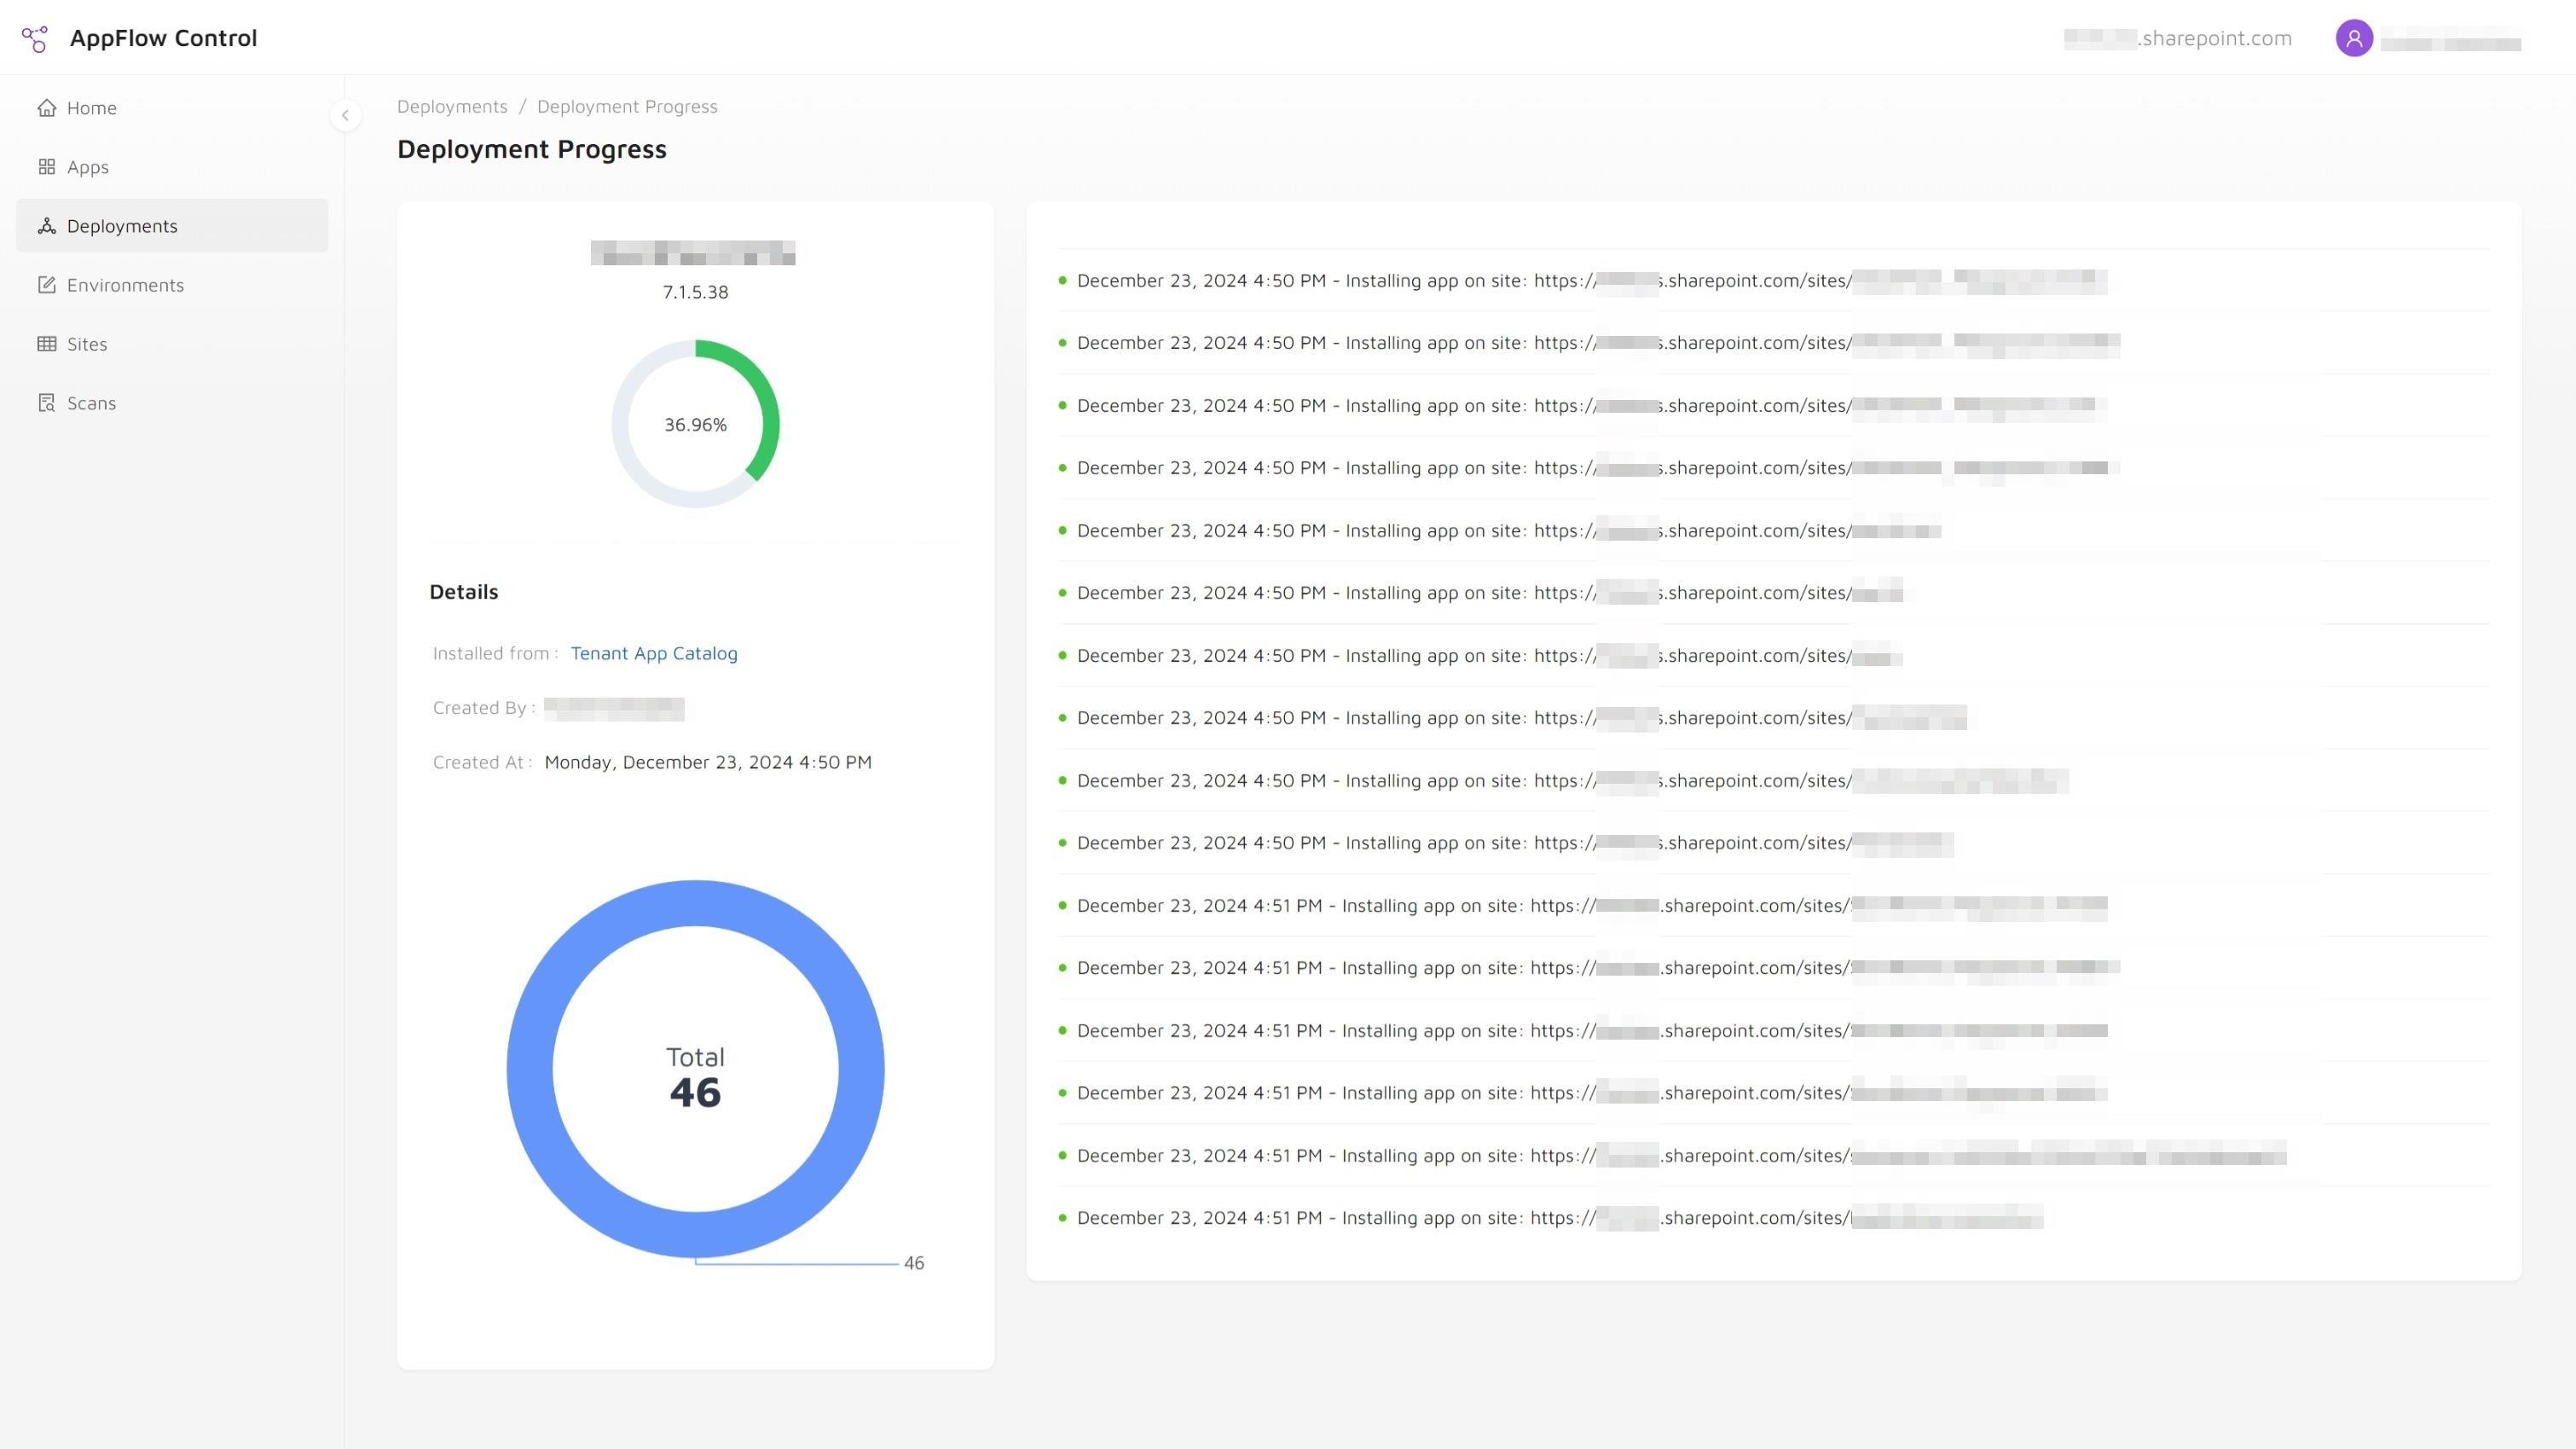
Step 11: Track Deployment Progress
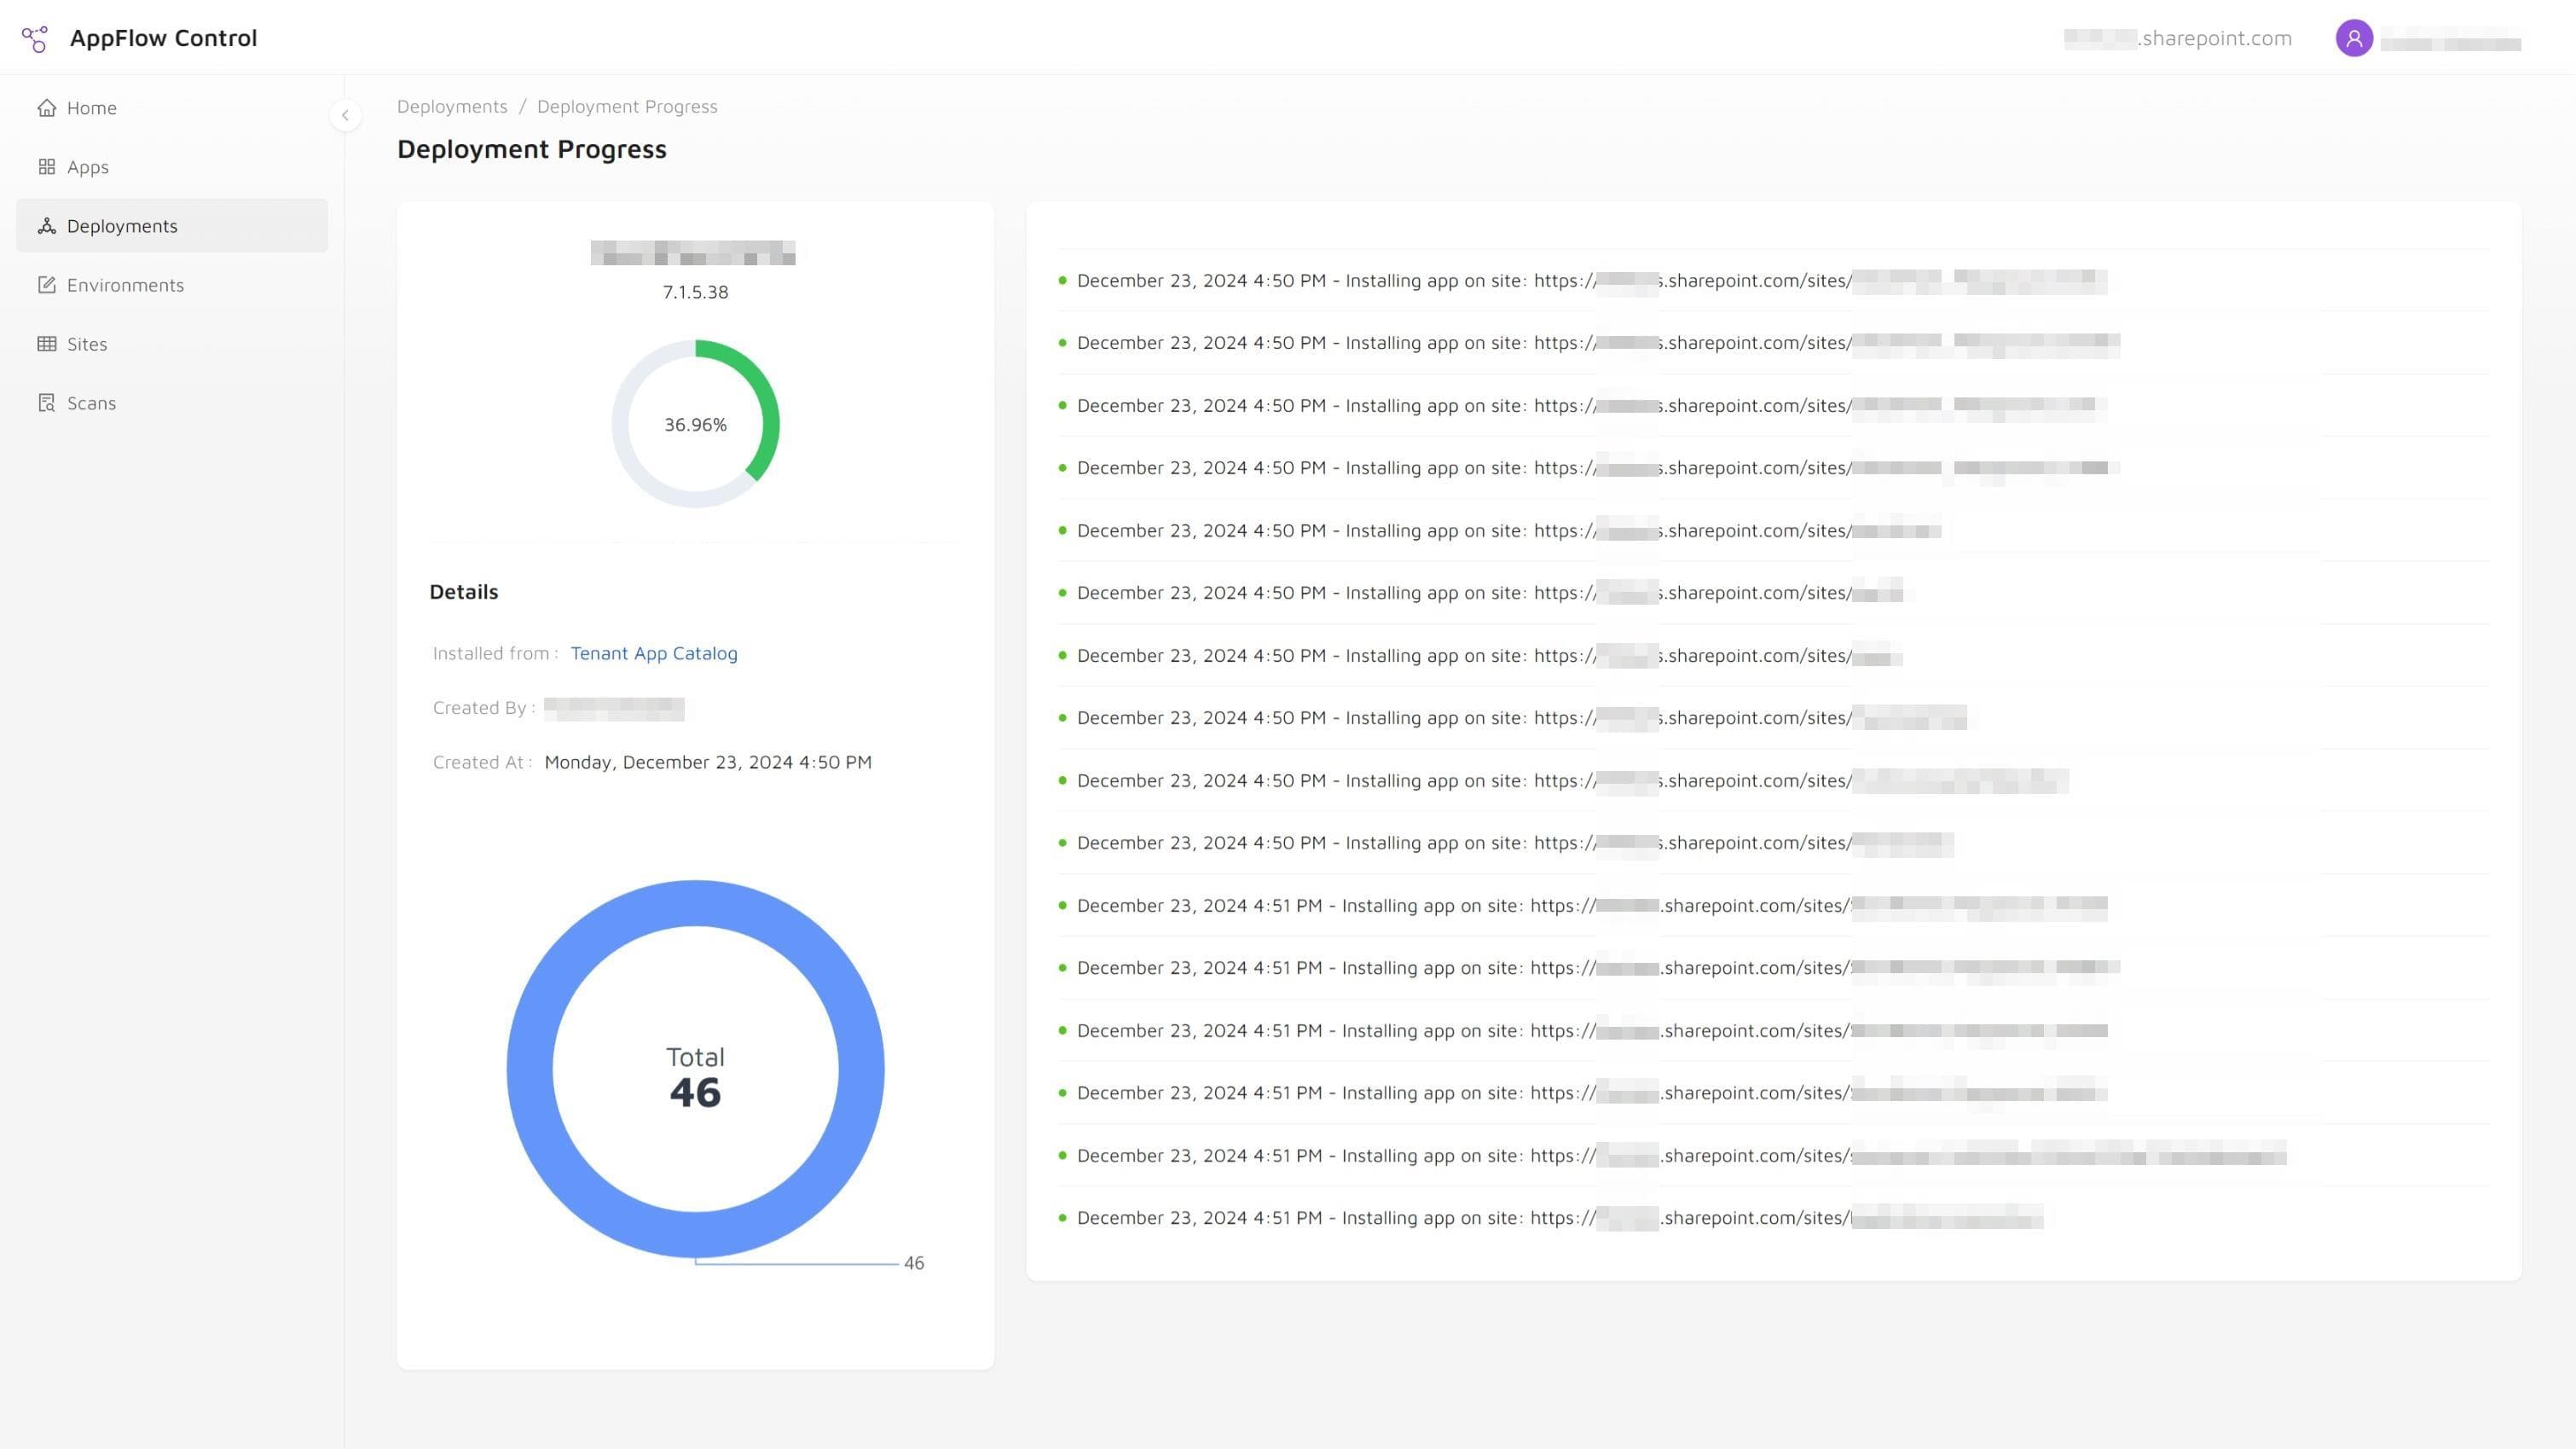
Click View Deployment Progress to monitor the installation. The app becomes available on the target site as soon as the deployment completes.
What To Validate After Rollout
After the deployment finishes, confirm three things:
- the app is installed on the intended sites,
- the rollout did not miss any filtered targets,
- and the sites that received the package match the governance decision you intended at the start.
If you need the installation inventory after deployment, use how to locate SharePoint SPFx app installations across multiple sites. If the rollout will be followed by a high-risk change, pair it with how to find where a SharePoint web part is used before you update or remove it.
Next Step For Repeatable Deployment Control
The goal is not only to install one app faster. It is to create a deployment workflow that stays understandable when the environment, the number of sites, and the number of app changes all grow at once.
If your current process is still too dependent on scripts or local admin knowledge, compare PnP PowerShell with UI-driven SharePoint app management, review the case study How a SharePoint Admin Team Replaced Weekend PowerShell Audits with Live App Inventory, and see Custom SharePoint Solutions. Together they show when a deployment issue is really an operating-model issue.
Next step
Turn this workflow into a repeatable process with AppFlow Control
AppFlow Control helps administrators move from reactive troubleshooting to visible, repeatable deployment and support workflows across SharePoint environments.